感觉自己有点不务正业,明明是一个大后端,却要去折腾前端,又折腾的不够专业。都来鄙视我吧。
目前一般使用vite作为前端构建工具,下面所记录的是使用vite,在vscode编辑器下面的配置,其他构建工具和编辑器可参考,大体类似。使用vite初始化项目后,一般需要作一下配置,才更加符合前端工程化特点。
代码规范
eslint代码检查工具,按照规定的规则检测代码可能存在的问题。prettier则是代码格式化的工具。配合vscode对应的两个扩展ESLint 和Prettier - Code fORMatter ,代码编写起来如虎添翼。关于Prettier不生效解决办法参考:20240101 VS Code Prettier格式化不生效解决方式。
扩展安装:
1
2
3
4
5
6
# eslint支持
pnpm add -D eslint eslint-plugin-vue eslint-define-config
# prettier 支持
pnpm add -D prettier eslint-plugin-prettier @vue/eslint-config-prettier
# 对ts的支持
pnpm add -D @vue/eslint-config-typescript @typescript-eslint/eslint-plugin @typescript-eslint/parser
其中eslint,prettier和eslint-plugin-prettier是必须要安装的,eslint-define-config使之更加容易编写配置,添加ts支持,增加ts的代码检测。
需要注意的是,vscode对于这些配置不是立马生效的,如果遇到不生效,可以尝试重启 ,看是否能解决问题。
eslint代码检查安装好eslint之后,运行npx eslint --init初始化可生成eslint的配置,跟着提示一步一步的来即可,在当前目录就可以生成对应的配置文件。需要注意的是,默认生成的是CommonJS格式的,扩展为cjs的。不过,手工配置更加灵活,不过需要注意的时候,最好用npx eslint --init生成的名字,否则可能会出现以下莫名其妙的问题。
.eslintrc.cjs参考配置(vue):
 1
 2
 3
 4
 5
 6
 7
 8
 9
10
11
12
13
14
15
16
17
18
19
20
21
22
23
24
25
26
27
28
29
30
31
32
33
34
35
36
37
38
39
40
41
42
43
44
45
46
47
48
49
50
51
52
53
54
55
56
57
58
59
60
61
62
63
64
65
66
67
68
69
70
71
72
73
74
75
76
77
78
79
80
81
82
83
84
85
86
87
88
89
90
91
92
93
// 需要安装依赖: npm i eslint-define-config
const { defineFlatConfig } = require ( 'eslint-define-config' )
module . exports = defineFlatConfig ({
root : true ,
/* 指定如何解析语法。*/
parser : 'vue-eslint-parser' ,
/* 优先级低于parse的语法解析配置 */
parserOptions : {
parser : '@typescript-eslint/parser' ,
//模块化方案
sourceType : 'module' ,
},
env : {
browser : true ,
es2021 : true ,
node : true ,
// 解决 defineProps and defineEmits generate no-undef warnings
'vue/setup-compiler-macros' : true ,
},
// https://eslint.bootcss.com/docs/user-guide/configuring#specifying-globals
globals : {},
extends : [
'plugin:vue/vue3-recommended' ,
'eslint:recommended' ,
'plugin:@typescript-eslint/recommended' , // typescript-eslint推荐规则,
'prettier' ,
'plugin:prettier/recommended' ,
'./.eslintrc-auto-import.json' ,
],
// https://cn.eslint.org/docs/rules/
rules : {
// 禁止使用 var
'no-var' : 'error' ,
semi : 'off' ,
// 优先使用 interface 而不是 type
'@typescript-eslint/consistent-type-definitions' : [ 'error' , 'interface' ],
'@typescript-eslint/no-explicit-any' : 'off' , // 可以使用 any 类型
'@typescript-eslint/explicit-module-boundary-types' : 'off' ,
// 解决使用 require() Require statement not part of import statement. 的问题
'@typescript-eslint/no-var-requires' : 0 ,
// https://github.com/typescript-eslint/typescript-eslint/blob/main/packages/eslint-plugin/docs/rules/ban-types.md
'@typescript-eslint/ban-types' : [
'error' ,
{
types : {
// add a custom message to help explain why not to use it
Foo : "Don't use Foo because it is unsafe" ,
// add a custom message, AND tell the plugin how to fix it
String : {
message : 'Use string instead' ,
fixWith : 'string' ,
},
'{}' : {
message : 'Use object instead' ,
fixWith : 'object' ,
},
},
},
],
// 禁止出现未使用的变量
'@typescript-eslint/no-unused-vars' : [
'error' ,
{ vars : 'all' , args : 'after-used' , ignoreRestSiblings : false },
],
'vue/html-indent' : 'off' ,
// 关闭此规则 使用 prettier 的格式化规则,
'vue/max-attributes-per-line' : [ 'off' ],
// vue3.2.25之后为props使用解耦赋值语法,删除警告
'vue/no-setup-props-destructure' : 'off' ,
// 优先使用驼峰,element 组件除外
'vue/component-name-in-template-casing' : [
'error' ,
'PascalCase' ,
{
ignores : [ '/^el-/' , '/^router-/' ],
registeredComponentsOnly : false ,
},
],
// 强制使用驼峰
camelcase : [ 'error' , { properties : 'always' }],
// 优先使用 const
'prefer-const' : [
'error' ,
{
destructuring : 'any' ,
ignoreReadBeforeAssign : false ,
},
],
},
})
大神做好了自己的配置:https://github.com/antfu/eslint-config ,也可以参考。
在vite运行时,也希望运行eslint进行代码检查,那么可以这么做:
安装包:
1
pnpm add - D vite - plugin - eslint
对vite.config.JS配置进行修改:
 1
 2
 3
 4
 5
 6
 7
 8
 9
10
11
12
13
import { defineConfig } from 'vite'
import vue from '@vitejs/plugin-vue'
import eslintPlugin from 'vite-plugin-eslint' //导入包
export default defineConfig ({
plugins : [
vue (),
// 增加下面的配置项,这样在运行时就能检查eslint规范
eslintPlugin ({
include : [ 'src/**/*.JS' , 'src/**/*.vue' , 'src/*.JS' , 'src/*.vue' ]
})
]
})
prettier代码格式化eslint也可以进行代码格式化的,不过代码格式用的人比较多的还是prettier。
这里是.prettierrc.JS的参考:
 1
 2
 3
 4
 5
 6
 7
 8
 9
10
11
12
13
14
15
16
17
18
19
20
21
22
23
// 在项目根目录创建文件 .prettierrc.JS
// 以下配置视自己情况而定,并步是每个都需要的
{
tabWidth : 4 , // 使用4个空格缩进
semi : false , // 代码结尾是否加分号
trailingComma : 'none' , // 代码末尾不需要逗号
singleQuote : true , // 是否使用单引号
printWidth : 100 , // 超过多少字符强制换行
arrowParens : 'avoid' , // 单个参数的箭头函数不加括号 x => x
bracketSpacing : true , // 对象大括号内两边是否加空格 { a:0 }
endOfLine : 'auto' , // 文件换行格式 LF/CRLF
useTabs : false , // 不使用缩进符,而使用空格
quoteProps : 'as-needed' , // 对象的key仅在必要时用引号
jsxSingleQuote : false , // jsx不使用单引号,而使用双引号
jsxBracketSameLine : false , // jsx标签的反尖括号需要换行
rangeStart : 0 , // 每个文件格式化的范围是文件的全部内容
rangeEnd : Infinity , // 结尾
requirePragma : false , // 不需要写文件开头的 @prettier
insertPragma : false , // 不需要自动在文件开头插入 @prettier
proseWrap : 'preserve' , // 使用默认的折行标准
htmlWhitespaceSensitivity : 'CSS' // 根据显示样式决定html要不要折行
}
自用的配置参考如下(单引号,末尾没有分号,这里添加了tailwindcss):
 1
 2
 3
 4
 5
 6
 7
 8
 9
10
11
12
13
/** @type {import { Config } from "prettier";}*/
export default {
useTabs : false ,
bracketSameLine : true ,
bracketSpacing : true ,
trailingComma : 'all' ,
tabWidth : 2 ,
semi : false ,
singleQuote : true ,
quoteProps : 'as-needed' ,
printWidth : 120 ,
plugins : [ 'prettier-plugin-tailwindcss' ],
}
husky git 提交规范
husky是git钩子,所谓的钩子,就是在commit,push等操作之前,检测是否符合规范,如果不符合则直接拒绝。
安装:
1
npx husky - init && pnpm i
安装之后,在package.json自动增加:
1
2
3
4
5
"scripts" : {
...
"prepare" : "husky install"
...
},
会在当前项目的目录增加.husky目录,目录有个脚本文件pre-commit,提交代码之前,会运行里面的脚本。所以,一般在package.json增加命令:
1
2
3
4
5
"scripts" : {
...
"lint" : "eslint src --fix --ext .JS,.ts,.jsx,.tsx,.vue && prettier --write \"src/**/*.{JS,ts,json,tsx,CSS,scss,vue,HTML,md}\" --ignore-unknown" ,
...
},
然后,pre-commit增加调用pnpm lint则可以提交之前,对代码进行检查和格式化。
这样配置的一个问题是,无论我们改动多少,都会对整个项目代码进行检查和格式化,效率不高的,我们的目标是只对改动的代码做检测和格式化。这个时候要用到另外一个包:lint-staged,对git add的暂存区进行检查和格式化。
 1
 2
 3
 4
 5
 6
 7
 8
 9
10
11
12
13
pnpm add - D lint - staged
// package.json 新增
"lint-staged" : {
"*.{vue,JS,ts,tsx,jsx}" : [
"eslint --fix" ,
"prettier --write --ignore-unknown"
]
},
// .husky/pre-commit改动:
// pnpm lint替换为
npx lint - staged
前面的提交约束是代码,下面约束的时候提交的文档,避免无意义的提交说明。
安装(也可以全局安装,这样各个项目都可以用到):
 1
 2
 3
 4
 5
 6
 7
 8
 9
10
11
pnpm add - D commitizen
// 运行以下命令初始化 --force视具体情况添加
$ commitizen init cz - conventional - changelog -- pnpm -- save - dev -- save - exact -- force
// package.json 增加可以pnpm commit,不过不习惯这个commit方法
"scripts" : {
...
"commit" : "cz"
...
},
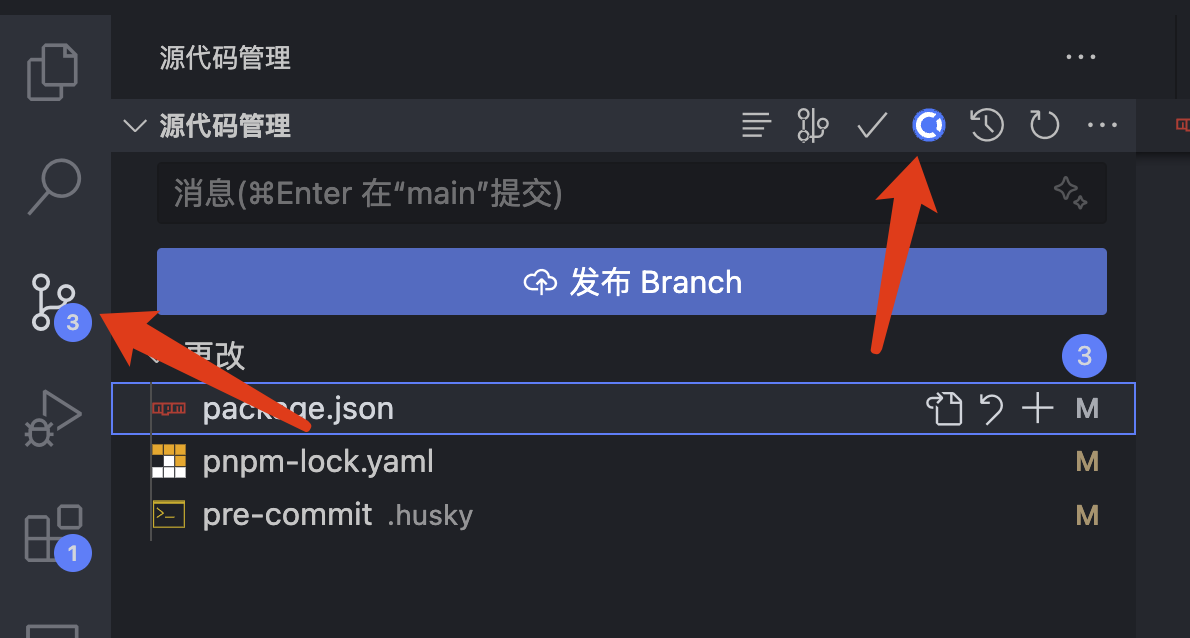
这样之后,就可以用git cz 或pnpm commit进行代码的提交。在命令行操作或者感觉不方便,vscode也有提供插件:Visual Studio Code Commitizen Support 。安装之后,点一点按钮即可:
为了强制提交的messsage必须符合规范,用commitlint配合husky使用的。
安装:
1
pnpm add - D @ commitlint / config - conventional @ commitlint / cli
安装后,增加配置文件commitlint.config.cjs:
1
2
3
module . exports = {
extends : [ '@commitlint/config-conventional' ],
}
然后,添加到husky:
1
pnpm husky add . husky / commit - msg "npx --no-install commitlint --edit \"$1\""
如此依赖pre-commit和commit-msg脚本里面的命令都可以运行到了。
Vite配置
目前大多数前端都是使用vite构建工具,所以也选择vite作为例子。
别名
别名设置就是为了导入其他文件的时候,不必要写全路径,比如import { useUserStore } from '@/store'。
 1
 2
 3
 4
 5
 6
 7
 8
 9
10
11
12
13
14
15
// tsconfig.json compilerOptions 内增加
"baseUrl" : "." ,
"paths" : {
"@/*" : [ "src/*" ]
}
// vite.config.JS defineConfig 内增加
// 需增加 pnpm install -D @types/node
import { fileURLToPath , URL } from "node:url" ;
...
resolve : {
alias : {
"@" : fileURLToPath ( new URL ( "./src" , import . meta . url )),
},
},
这样,@就可以alias为全src的全路径,导入时,直接可以使用该前缀。当然是可以指定多个不同文件的前缀的,比如有些项目喜欢将components目录用cpns简称。
环境变量.env文件
环境变量是使用dotenv 通过.env文件提供,使用dotenv-expand 扩展变量。如:
1
2
3
4
. env # 所有情况下都会加载
. env . local # 所有情况下都会加载 , 但会被 git 忽略
. env .[ mode ] # 只在指定模式下加载
. env .[ mode ]. local # 只在指定模式下加载 , 但会被 git 忽略
环境变量有优先级,如.env<.env.local<.env.[mode]<.env.[mode].local。
如果使用的是typescript,为了使环境变量有提示,需要在env.d.ts文件(如果没有则创建)下,添加:
 1
 2
 3
 4
 5
 6
 7
 8
 9
10
/// <reference types="vite/client" />
interface ImportMetaEnv {
readonly VITE_APP_TITLE : string
// 更多环境变量...
}
interface ImportMeta {
readonly env : ImportMetaEnv
}
如果没有修改envPrefix,那么访问环境变量使用的是import.meta.env.VITE_SOME_KEY的方式,只有VITE_才能被访问到。需要注意的是,这是vite启动后才能访问到,如果没启动前,在vite.config.ts怎么访问的环境变量呢?做法是通过loadEnv函数,如:
1
2
3
4
5
6
7
8
import { defineConfig , loadEnv } from 'vite'
...
export default defineConfig (({ mode } : ConfigEnv ) => {
...
const env = loadEnv ( mode , process . cwd ())
console . log ( `env: ${ env . VITE_APP_API_BASE_URL } ` )
...
}
环境变量是配置在.env文件里面的,使用的是dotenv,使用dotenv-expand 扩展变量,根据不同的环境加载不同的环境变量。如果环境变量名一样,优先级也不一样,越少详细的,优先级越高如:
1
2
3
4
. env # 所有情况下都会加载
. env . local # 所有情况下都会加载 , 但会被 git 忽略
. env .[ mode ] # 只在指定模式下加载
. env .[ mode ]. local # 只在指定模式下加载 , 但会被 git 忽略
 1
 2
 3
 4
 5
 6
 7
 8
 9
10
/// <reference types="vite/client" />
interface ImportMetaEnv {
readonly VITE_APP_TITLE : string
// 更多环境变量...
}
interface ImportMeta {
readonly env : ImportMetaEnv
}
按需加载和自动导入
一般我们使用库的时候,使用的是库的很小部分功能,如果整个库导入的话,那么必定会导致最终的打包文件过大。所以一般来说,我们要求最终的打包文件都是按需导入的。这是通过unplugin-vue-components这个插件来完成,unplugin-vue-components插件内部内置了多个常用的库,比如ElementPlus的配置:
 1
 2
 3
 4
 5
 6
 7
 8
 9
10
// 我们需要配置dts: 'src/type/components.d.ts', 否则ts-lint会报错
plugins : [
...
Components ({
resolvers : [ ElementPlusResolver ()],
dts : 'src/type/components.d.ts' ,
}),
...
],
}
自动导入是自动帮你导入对应的函数等,而不必要自己手工导入,使用的是:unplugin-auto-import这个插件,比如:
1
2
3
4
5
6
7
8
9
// 没使用unplugin-auto-import写法
import { computed , ref } from 'vue'
const count = ref ( 0 )
const doubled = computed (() => count . value * 2 )
// 使用unplugin-auto-import的写法
const count = ref ( 0 )
const doubled = computed (() => count . value * 2 )
配置:
 1
 2
 3
 4
 5
 6
 7
 8
 9
10
11
12
13
14
15
16
17
18
plugins : [
...
AutoImport ({
resolvers : [ ElementPlusResolver ()],
// 自定引入 Vue VueRouter API,如果还需要其他的可以自行引入
imports : [ 'vue' , 'vue-router' ],
// 调整自动引入的文件位置
dts : 'src/type/auto-import.d.ts' ,
// 解决自动引入eslint报错问题 需要在eslintrc的extend选项中引入
eslintrc : {
enabled : true ,
// 配置文件的位置
filepath : './.eslintrc-auto-import.json' ,
globalsPropValue : true ,
},
}),
...
}
vscode等一写编辑器也会自动导入库,自己输入函数时就有弹框选择,与此不同的是,直接的文件上面自动导入。至于是否需要使用这个库,看每个人的口味。
需要注意的是,此两个插件是vite的插件,需要运行vite的时候,才会生成对应的.d.ts文件。
代理
代理主要是为了解决跨域问题,后端服务可能有多个,有时候也要和后端开发联调。vite配置如下:
 1
 2
 3
 4
 5
 6
 7
 8
 9
10
server : {
proxy : {
// 使用 proxy 实例,VITE_APP_API_BASE_URL可以配置在环境变量
'/api' : {
target : env . VITE_APP_API_BASE_URL ,
changeOrigin : true ,
rewrite : path => path . replace ( /^\/api/ , '/api' ),
},
},
},
注意的时候target是要以http或https开头,根据不同的环境配置不同target。
mock
在后端还没有开发好或者不具备联调,而且接口文档已经制定好的情况下,前端可以直接mock数据进行测试。又或者是要做演示的时候,也可以使用mock数据。是通过vite-plugin-mock插件实现的,mock数据的生成可以使用mockjs。vite配置如下:
 1
 2
 3
 4
 5
 6
 7
 8
 9
10
11
plugins : [
...
// 配置mock
viteMockServe ({
mockPath : 'mock' ,
// 根据实际情况开启或者关闭
enable : true ,
logger : true ,
}),
...
],
mock目录文件示例:
 1
 2
 3
 4
 5
 6
 7
 8
 9
10
11
12
13
14
15
16
17
18
19
20
21
22
23
24
import { MockMethod } from 'vite-plugin-mock'
const mockList : MockMethod [] = [
...
{
url : '/api/login' ,
method : 'post' , // 请求方式
statusCode : 200 , // 返回的http状态码
response : opt => {
console . log ( opt )
return {
// 返回的结果集
statusCode : 200 ,
desc : '登录成功' ,
result : {
name : 'hello' ,
},
}
},
},
...
]
export default mockList
当开启mock时,proxy不生效。
其他
防抖和节流
防抖和节流是前端性能优化的两种方法,同时也可以避免一些后端考虑不周出现的一些意外问题(比如短时间内出现多起同样的业务)。
防抖的意思是:指触发事件后,在n秒内函数只执行一次,如果在n秒内又触发了事件,则会重新计算函数执行时间。简单来说,就是让某个函数在一定时间内只执行一次,如果期间有多次调用,则以最后一次为准。
节流的意思是:指连续触发事件但是在n秒内只执行一次函数。简单来说,就是某个函数在一定时间内只执行一次,无论用户触发了多少次。
两者区别在于执行的时机,防抖是在某个时间段内最后一次触发后执行 ,而节流是在某个时间段内均匀执行一次 。
实现这两个功能,一般使用的时候lodash库,debounce函数实现防抖,throttle实现节流。
其他问题
extends
从旧的项目来,经常会碰到在tsconfig的配置里面extends的配置项,由于新版删除了这些配置,所以直接报错,修改:
 1
 2
 3
 4
 5
 6
 7
 8
 9
10
11
12
13
14
15
16
"extends" : [
"@vue/tsconfig/tsconfig.web.json"
],
=>
"extends" : [
"@vue/tsconfig/tsconfig.dom.json" ,
"@vue/tsconfig/tsconfig.lib.json"
],
"extends" : [
"@vue/tsconfig/tsconfig.node.json"
],
=>
"extends" : [
"@vue/tsconfig/tsconfig.json"
],
esm
新生成的项目基本都是全面拥抱esm,具体的表现为,在package.json里面多了一个配置项:"type": "module"。而很多工具生成的是CommonJS格式,导致报错,最简单的方式是把JS扩展名改为cjs扩展名。或者改为esm模式,比如postcss.config.JS:
 1
 2
 3
 4
 5
 6
 7
 8
 9
10
11
12
13
// module.exports = {
// plugins: {
// tailwindcss: {},
// autoprefixer: {},
// },
// }
export default {
plugins : {
tailwindcss : {},
autoprefixer : {},
},
}
参考
vite.config.ts